New post This is a sample post
Pedicure

Legs and hands are often exposed to outside pollution, UV rays etc... So we need to definitely take care of these parts of our body. Pedicure is for our legs. In this blog let's discuss more tips and tricks for getting baby-soft feet with salon-worthy pedicures.
Necessary pedicure supplies:

No need to search more for products, we need to just take some essential ones. They will be ready in the market and no need to buy expensive ones just make sure you have good ones.
Products include -
1. Nail Polish remover
2. Nail File and clippers
3. Pumice stone or foot file
4. Foot cream
5. cuticle remover
6. cuticle oil
7. Nail polish with base and topcoat
Let's get started,
Step 1: Get rid of remnants from your last pedicure.

Take a cotton ball or cotton pad and dip that in nail polish remover and hold that on each nail and allow the paint to break down before you start swiping for the smooth finish at the end. And if you see any stains or yellow tinges take some cuticle oil and rub over it to lighten it's residue. It is normally seen when removing darker colors.
Step 2: Soak your toes and feet.

For the best experience, have a good ambiance around you. And then, take a bowl or bathtub is totally fine, now fill it with warm water, a liberal scoop of skin-soothing bath salts, and some aromatic perfume and then soak your feet. It softens tough skin and cuticles and gives you relaxation. Leave your feet for a few minutes and then let's move to the next step.
Step 3: Get rid of dead skin if any

After patting your feet dry, grab a foot file or pumice stone and rub it over your skin to remove any dead skin. Focus more on heels, and other calloused, hard areas. Scrap until your feet feel smooth, and no dirt left.
Step 4: Trim your toenails
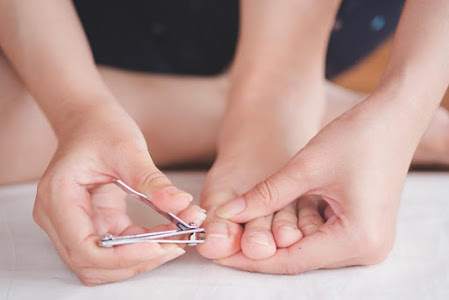
Take nail clipper and trim and cut your nails. Don't worry about getting edges perfect. We will take care of that in our next step.So just whip your toenails into shape.
Step 5: Shape your toenails

Now that your toenails are at a perfect length, it's time to smooth them out. Pick up a nail file and shape the corners and edges. There's no need to rush during this step—take your time filing until all of your nails are even.
Step 6: Add some cuticle oil

By doing this it'll show a major difference in the shine, health, and overall strength of your nails. cuticles have more importance in your nail health. they protect nails from bacteria. So be careful and gentle
Step 7: Massage your feet with a lotion

With a lotion or foot cream, massage your leg for some time so that our feet get enough nourishment and hydration
Step 8: Apply a layer of base coat

Since the base coat acts as a barrier between the natural oils that come from your nails and your actual polish, it's super important to swipe it on if you want your pedicure to last.
Step 9: Paint your toenails

If you have toe separators use them, it will help to prevent the polish from smudging. Apply two thin coats of your color of choice, and let the paint dry for a few minutes between each coat.
Step 10: Finish with topcoat

A layer on a topcoat is to seal in the nail polish for longer days. So don't skip this step. You'll have lovely nails with a super shiny and long-lasting finish.
So it gives the best salon at home experience and makes sure you do pedicures frequently for the best skin and toe nails.
Comments
Post a Comment